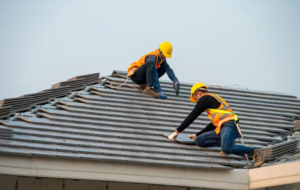
Before starting a fence project, have a service provider locate any underground utilities. This will prevent damage and delays and help ensure your project complies with local regulations.
Posts and rails provide the foundation for pickets or boards, which are usually made of cedar, redwood, pine, or pressure-treated wood. Staining protects the wood from moisture, UV rays, and insects. Contact Fencing Summerville SC for professional help.
Cedar is an excellent choice for fencing services because it’s known for its durability and beauty. It’s also an eco-friendly option for homeowners who value sustainability and the preservation of natural ecosystems. Cedar’s natural oils repel moisture and protect it from rot and insects, reducing the need for chemical treatments that can pollute soil and waterways. Its longevity means it requires fewer repairs and replacements, further lowering maintenance costs for homeowners.
In addition, cedar is an environmentally responsible choice because it’s a renewable resource that’s harvested responsibly from forests that remain healthy and sustainable for generations. This helps reduce the demand for wood products made from more toxic materials, such as pressure-treated lumber that’s usually treated with chemical preservatives to withstand exposure to harsh weather elements and pests.
Although it is possible to DIY a cedar fence project, hiring professional contractors ensures that the job is done correctly and complies with all local building codes and standards for safety. They have the experience and knowledge to recommend the right type of cedar and design for your home based on the climate and geographical conditions that occur in your area. They can also provide advice on how to maintain the longevity of your cedar fence, such as avoiding direct contact with soil and maintaining proper ventilation to avoid moisture damage.
Another advantage of working with a professional to install or repair your cedar fence is that they can add custom features to the structure, such as panel inserts and decorative caps. This allows you to create a more unique look that complements your property’s style and enhances your curb appeal.
While cedar fences have a higher initial cost than other types of fencing materials, their lifespan and low maintenance requirements mean they’re a smart investment for homeowners. Regular maintenance is essential to maximizing the lifespan of your cedar fence, including cleaning with an oxygen bleach solution and applying a protective seal every 2-3 years. Inspecting your fence regularly and scheduling periodic professional assessments will help prevent sagging or other structural issues over time.
Redwood
Redwood is a classic material that can enhance the aesthetics of your home and add value to your property. Its natural beauty and unique grain patterns create a timeless look that complements many different architectural styles. It also has natural resistance to rot, insect infestation, and warping. With proper care, a redwood fence can last a lifetime.
A professional redwood fencing company can help you choose the right style for your home. They will start by creating a custom design based on the type of fence you want. Then they will measure the area and order the necessary materials. During the installation process, they will set posts and attach rails, then install redwood planks to create your fence.
When choosing a redwood fencing contractor, it is important to consider their experience and reputation. Look for a company with positive online reviews and testimonials from past clients. A good contractor will also carry liability insurance to protect you and their workers in case of an accident. Beware of a company that offers extremely low prices as they may not be insured or carry proper licensing.
Redwood fences come in a wide range of designs to match any style of home. They can be crafted into lattice, picket, or board-on-board styles. A popular option is a privacy fence. These fences provide privacy and security while enhancing the beauty of your home. Another popular choice is a shadow box fence. These fences have a creative look with a decorative lattice pattern that adds a nice touch to your yard.
Both cedar and redwood are environmentally friendly options that are certified by the Forest Stewardship Council. Both take over 50 years to grow and harvest, making them a sustainable choice for wood fences. Redwood is also more durable than cedar, which can make it a smart investment for homeowners who are concerned with longevity.
Whether you choose redwood or cedar, you can count on your new wood fence to stand strong against the elements and add value to your home for years to come. If your fence ever becomes damaged or worn, a professional repair service can restore its strength and beauty.
Cypress
The right fence elevates the look of your home, adding privacy and security while also enhancing its curb appeal. The material you choose plays an important role, too, as different woods offer unique aesthetics and durability. Your local climate will dictate the ideal wood type for your property. Areas with high humidity or frequent rainfall need materials that naturally resist moisture to prevent warping and rot. Many woods have natural insect-repelling oils, while others can be treated with chemical solutions for enhanced protection.
Cypress is a natural choice for humid climates due to its rot and insect-repelling properties. This tan to reddish-brown wood has few knots and is relatively easy to work with. Like cedar, it is best kept protected with a semi-transparent stain every few years to preserve its color and prevent damage from UV rays.
Pressure-treated pine offers affordable, durable fencing that is a great option for drier areas. This budget-friendly option undergoes a chemical treatment that enhances its resistance to insects, rot, and decay. It also takes stain very well, so you can create a custom look with your fence.
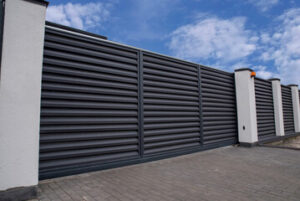
Looking for a low-maintenance alternative to real wood fencing? Cypress-colored vinyl is a beautiful option that offers the warmth and style of natural wood. Our team can help you create a gorgeous outdoor space for your PG County home with cypress-colored vinyl fencing that complements the style of your house and landscape. Contact us today to learn more about our fencing services and how they can transform your home.
Other Woods
Wood fencing adds a warm, rustic charm to any property while offering privacy and security. It is also versatile and customizable to complement the unique aesthetic of your landscaping and create a distinctive look for your home or business. However, like any fence, it requires regular maintenance to remain functional and visually appealing.
Wood fence services include repairs, cleaning, staining or painting, and protecting against termites and rot. Annual inspections help catch problems early, reducing the need for extensive repairs and extending the lifespan of your wooden fence. Cleaning removes dirt and debris from the surface of your fence, which prevents deterioration, and staining helps protect the wood from moisture and UV rays.
While the most common use of wood fences is to mark property boundaries, they are also commonly used in parking lots and outdoor spaces for a variety of commercial properties. In addition to enhancing curb appeal and adding an aesthetic element to a commercial space, a well-constructed wooden fence provides a safe barrier to protect workers and the public from hazards, such as equipment, materials, and vehicles.
When it comes to choosing a wood fence, there are many factors to consider, including budget and style. Cedar is a popular option, offering durability and natural beauty at an affordable price. It has a natural resistance to rot and insects and can last up to 30 years. It is also available in a wide range of colors to suit your aesthetic preferences.
Another durable choice for a wood fence is Redwood, which offers superior strength and visual appeal. While it is more expensive than other types of wood, its longevity and beauty make it a worthwhile investment. It also has natural oils that repel insect infestations, making it a good option for areas with termite issues.